- Key highlights
- Standard carports vs. RV carports: key differences
- Get the height right
- The importance of 4-foot on-center framing for tall structures
- Snow loads: what they are and why RV covers need to respect them
- Structural upgrades that maximize RV protection
- FAQs
- What usually changes for RVs
- How tall is an RV, really?
- Measure your RV the right way
- Clearance rule of thumb
- Typical RV heights
- Eave height vs. true clearance
- Why leg height affects structural stability
- What gets riskier as height increases
- What “on-center” means
- Why 4-foot spacing is popular for strength upgrades
- When you should seriously consider it
- Ground snow load vs. roof snow load
- A homeowner-friendly way to choose the right rating
- Snow drift and sliding snow (the “surprise” loads)
- Upgrade 1: Choose the right roof style for your climate
- Upgrade 2: Add bracing where wind actually pushes
- Upgrade 3: Improve anchoring and base connection
- Upgrade 4: Go thicker on paneling
- Upgrade 5: Heavier framing when wind, height, or exposure is high
If you’ve ever watched hail bounce off an RV roof or chipped ice off your awning in January, you already know the truth: “Any cover” is not the same as “the right cover.” A well-built RV carport (also called an RV cover) protects your roof, seals, slide-outs, and paint from sun, rain, snow, and wind-driven debris. But to get real protection, you have to dial in three things: height/clearance, snow and wind loads, and smart structural upgrades.
Key highlights
- Measure your RV’s true height (include AC units, vents, antennas) and add 12–18 inches of safety clearance.
- Leg height affects stability. Taller structures catch more wind and usually need better bracing and anchoring.
- Snow load is location-based. Roof snow design starts with ground snow load and factors like exposure and importance per ASCE 7.
- 4-foot on-center framing (or closer spacing) is a common upgrade path for strength, especially as height and exposure increase. Engineers often set leg spacing around 4–5 feet depending on design.
- For RV protection, the best “bang-for-buck” upgrades are often vertical roof panels, stronger framing/bracing, and heavier-gauge paneling.
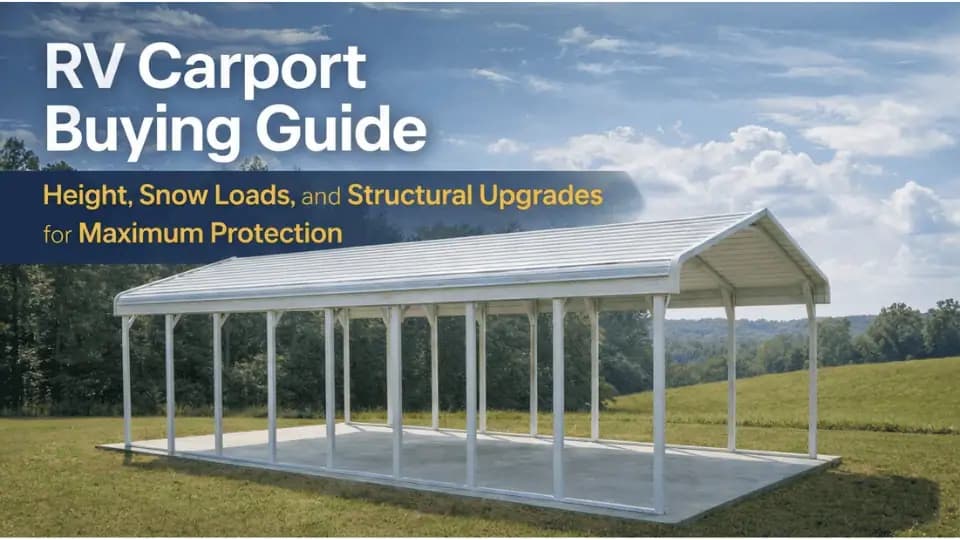
Standard carports vs. RV carports: key differences
A standard carport is built around passenger vehicles. An RV carport is built around clearance + longer spans + higher loads.
What usually changes for RVs
- Height and entry clearance: You need enough vertical room to pull in without white-knuckling the rooftop AC.
- Length and overhang protection: RVs are long. You want coverage for the roofline, not just the tires.
- Wind exposure: RV covers are often more open than garages, so wind can push rain and snow under the roof.
- Load demands: In snow country or high-wind areas, the structure may need engineering/certification and upgrades.
If you’re shopping on Get Carports, you’ll see RV-specific options like RV covers and RV carports with taller eave heights and customization choices (side panels, ends, doors, and more).
Get the height right
How tall is an RV, really?
Most RV owners underestimate height because they measure the body, not the accessories. Many Class A rigs commonly land around 12 to 13.5 feet in height, and other RV types vary by class.
Measure your RV the right way
- Park on level ground.
- Measure from the ground to the tallest fixed point:
- roof AC unit
- satellite dome
- vent covers
- solar panel edges
- antennas (if fixed)
- Write down the number and label it: “true travel height.”
Clearance rule of thumb
Add 12–18 inches to your true travel height for comfortable pull-in clearance and small site variations.
Contractors and farmers: do the same for enclosed trailers, skid steer trailers, or tractors with exhaust stacks. “Close enough” becomes expensive fast.
Typical RV heights
| RV type | Common height range | What to watch for |
| Class A motorhome | ~12–13.5+ ft | Tallest category, rooftop AC and domes add up |
| Class C motorhome | often ~10–12 ft | Cab-over height + AC unit |
| Class B camper van | often ~8–10 ft | Roof racks and fans |
| Fifth wheel | often ~12–13 ft | Front cap height and AC units |
Eave height vs. true clearance
Most RV carport listings show eave height (height at the side). Your usable clearance depends on roof style and pitch. Some roof shapes give you more center clearance than the eave number suggests, but you still want enough height where you actually drive.
Why leg height affects structural stability
When you raise leg height, you increase the structure’s “sail area.” That means more wind force and more leverage on the posts and anchors. In plain terms: a taller carport needs better bones.
What gets riskier as height increases
1) Uplift (roof wants to peel)
Wind can create suction over the roof, especially on open-sided structures. Better anchoring and framing help resist uplift.
2) Racking (frame wants to “lean” sideways)
That side-to-side wobble is what bracing is designed to fight.
3) Fastener fatigue and “working” movement
A structure that flexes more can loosen fasteners over time, especially in gusty areas.
Real-world signs you should upgrade
- You live in an open field, ridge, or coastal zone (few wind breaks).
- Your planned leg height is well above standard car height.
- You want long length coverage (more lateral bracing demand).
Quick safety note
Always follow the manufacturer’s engineered design and your local code requirements. Loads and anchoring are not “one size fits all.”
The importance of 4-foot on-center framing for tall structures
What “on-center” means
On-center spacing is the distance from the center of one vertical leg to the center of the next. Tighter spacing usually means:
- more support points,
- less flex between legs,
- better load distribution.
Many suppliers use leg spacing in the 4–5 foot range, and it’s often set by engineering, not customer preference.
Why 4-foot spacing is popular for strength upgrades
In general, closer spacing increases structural capacity and provides more attachment points for framing and panels.
When you should seriously consider it
- Tall legs (RV clearance)
- Higher wind exposure
- Snow country (more roof load demand)
- Longer structures (more bracing demand along the length)
Snow loads: what they are and why RV covers need to respect them
Snow load is not just “how much snow falls.” Roof design snow load depends on:
- your ground snow load,
- exposure (open terrain vs. sheltered),
- thermal conditions,
- risk category/importance,
- and how snow can drift or slide.
Ground snow load vs. roof snow load
ASCE 7 is the core U.S. standard used to determine snow (and wind) design loads for buildings and structures. It starts with ground snow and converts it into roof loading using factors and equations.
A homeowner-friendly way to choose the right rating
You do not need to run engineering math yourself. Do this instead:
- Ask your county or permitting office what snow load (and wind speed) they expect on permit plans.
- Choose a building package that matches those requirements.
- Request engineered/stamped drawings if your jurisdiction requires them.
Snow drift and sliding snow (the “surprise” loads)
Even if your area has moderate snow, drift can pile up in weird places:
- near roof edges,
- where a taller wall meets a lower roof,
- near enclosed sides/ends,
- around nearby buildings or tree lines.
Engineering accounts for this. DIY guessing does not.
Structural upgrades that maximize RV protection
This is the part that separates “shade” from “protection.”
Upgrade 1: Choose the right roof style for your climate
Roof style matters for drainage and snow shedding.
- Regular roof: budget-friendly, rounded edges, typically best in mild conditions.
- Boxed-eave (A-frame horizontal): more house-like look, but often still uses horizontal panels.
- Vertical roof: panels run ridge-to-eave and generally shed water, leaves, and snow best, especially on longer buildings.
If you’re in heavy rain, pine needles, or snow country, a vertical roof is usually the safest long-term bet.
Upgrade 2: Add bracing where wind actually pushes
Common strength add-ons include:
- Extra leg braces and corner bracing
- Improved lateral bracing along the length
- Gable ends, which can add lateral stability in some designs
Upgrade 3: Improve anchoring and base connection
Your RV cover is only as strong as what it’s anchored to.
- Ground anchors for soil,
- Concrete anchors for slabs,
- Specific anchor patterns for wind uplift zones.
Local permit offices often care a lot about anchoring details, setbacks, and load ratings.
Upgrade 4: Go thicker on paneling
Panel gauge affects dent resistance and durability. The key concept:
- Higher gauge number = thinner metal
- Lower gauge number = thicker metal
Many builders consider 26-gauge a premium upgrade over 29-gauge for impact resistance and longevity.
26-gauge vs. 29-gauge panels (quick comparison)
| Feature | 29-gauge panels | 26-gauge panels |
| Thickness | Thinner | Thicker (more durable) |
| Dent resistance | Good | Better, especially for hail/branches |
| Cost | Lower | Higher (often worth it for RV covers) |
| Best fit | Mild climates, budget builds | Hail zones, long-term ownership, “protect the roof” buyers |
Upgrade 5: Heavier framing when wind, height, or exposure is high
For framing, the same gauge rule applies: lower number is thicker. Many industry explainers note that 12-gauge framing is thicker/stronger than 14-gauge, and it becomes more relevant as loads increase.
Where it tends to matter most:
- tall legs for RV clearance,
- wide spans,
- large openings (if you later enclose it into an RV garage),
- higher wind and snow requirements.
A practical buying checklist (homeowners, farmers, contractors)
1) Size the footprint (width and length)
- Length: RV length + a little buffer so the roofline and slide area are covered.
- Width: Enough space to walk around, open compartments, and avoid rubbing mirrors on posts.
2) Lock in clearance
- True RV height + 12–18 inches clearance.
- Consider roof style and where you enter.
3) Match loads to your zip code
- Ask your permitting office about wind and snow requirements.
- Choose certified/engineered options as needed.
4) Choose smart upgrades
If you want the “short list” that protects RVs best:
- Vertical roof (better shedding)
- Stronger bracing and anchoring (for wind and tall legs)
- Heavier panel gauge in hail zones (26-gauge upgrade)
- Consider tighter leg spacing and stronger framing when exposure is high
FAQs
What height RV carport do I need?
Start with your RV’s true height (include rooftop accessories) and add 12–18 inches of clearance. Many Class A rigs commonly sit around 12–13.5 feet, so RV covers often need taller leg heights than standard carports.
Is a vertical roof worth it for snow or heavy rain?
In most cases, yes. Vertical roofs are widely described as better for shedding water, debris, and snow because panels run ridge-to-eave and typically use additional framing.
Why does tall leg height require upgrades?
Taller structures catch more wind and create more leverage on posts and anchors. That often means you need better bracing and anchoring choices.
How do I know what snow load rating I need?
Your local building department can tell you what they expect for permits. Snow design commonly references ASCE 7, which starts from ground snow load and applies factors to determine roof loading.
Is 26-gauge paneling better than 29-gauge for RV covers?
Generally, yes, because it’s thicker and tends to resist dents better. It often costs more, but it’s a popular upgrade for long-term protection.
Ready to size your RV cover the right way?
If you want help matching height, roof style, and wind/snow load options to your location, start with Get Carports’ RV carports and RV covers category and request a quote based on your specs. You can also review Get Carports’ guidance on wind and snow load ratings and permitting prep before you order.